

How To Repair Leather Bench
I am a somewhat crafty person … until I am not. And so, I actually had no idea how to reupholster a bench when this item projection entered my radar.
My parents had an one-time, and very neglected bench in their basement, which they have had since the 1960'southward. It may even be older than that.
But information technology was still sturdy and a little cornball – then I thought …
Why not? Information technology's probably non that hard to reupholster a bench, right?
More DIY Dwelling Decor Projects You Might Similar
- How to Paint a Mirror Frame
- How to Refinish a Wood Veneer Kitchen Table
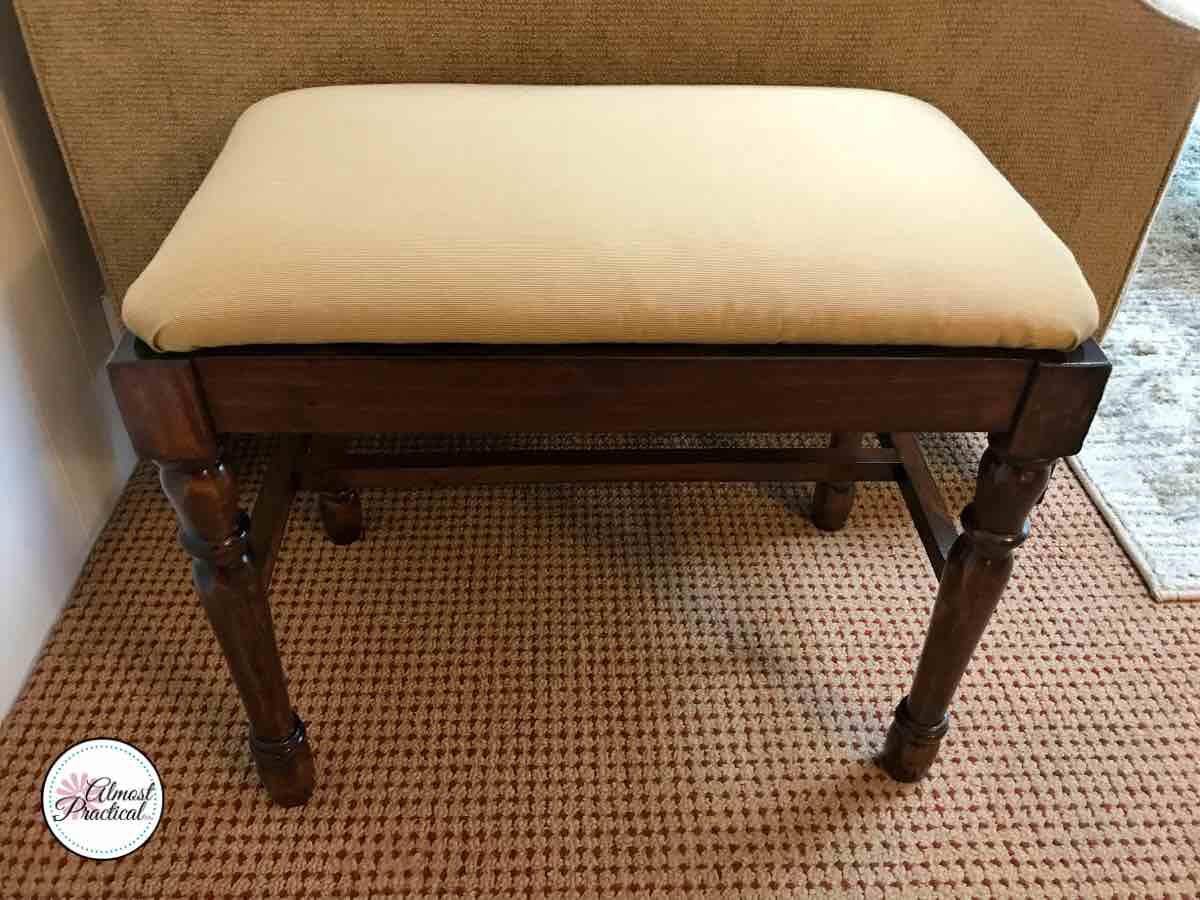
In the end, I can say that I am happy with the way that it turned out. Definitely not bad for a outset time upholstery DIY. But I'1000 not sure that I would do it again.
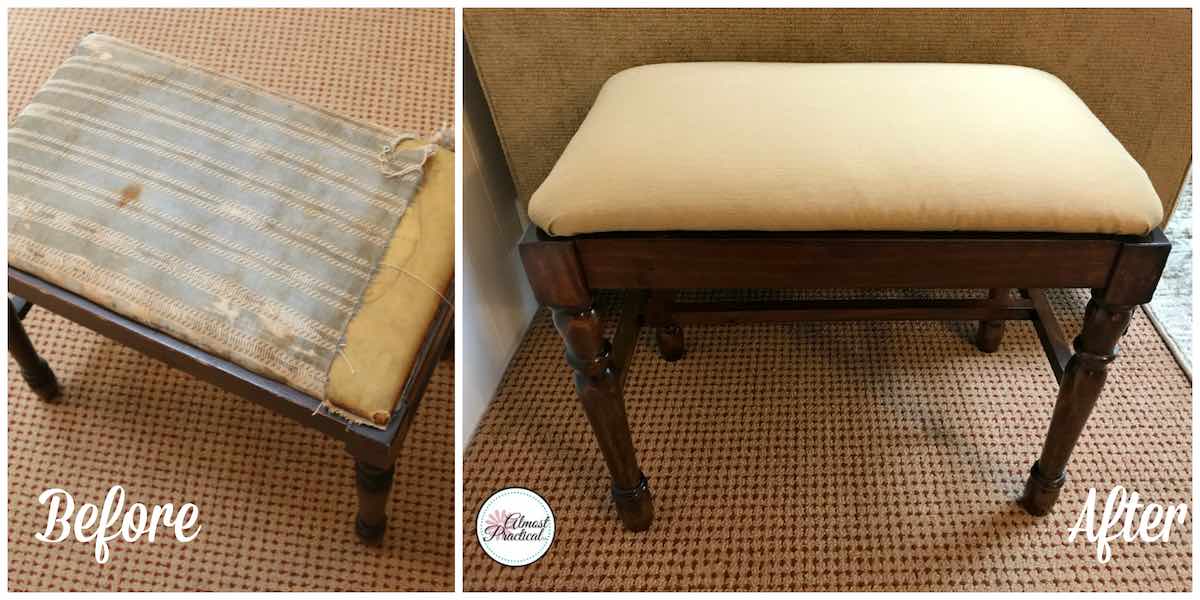
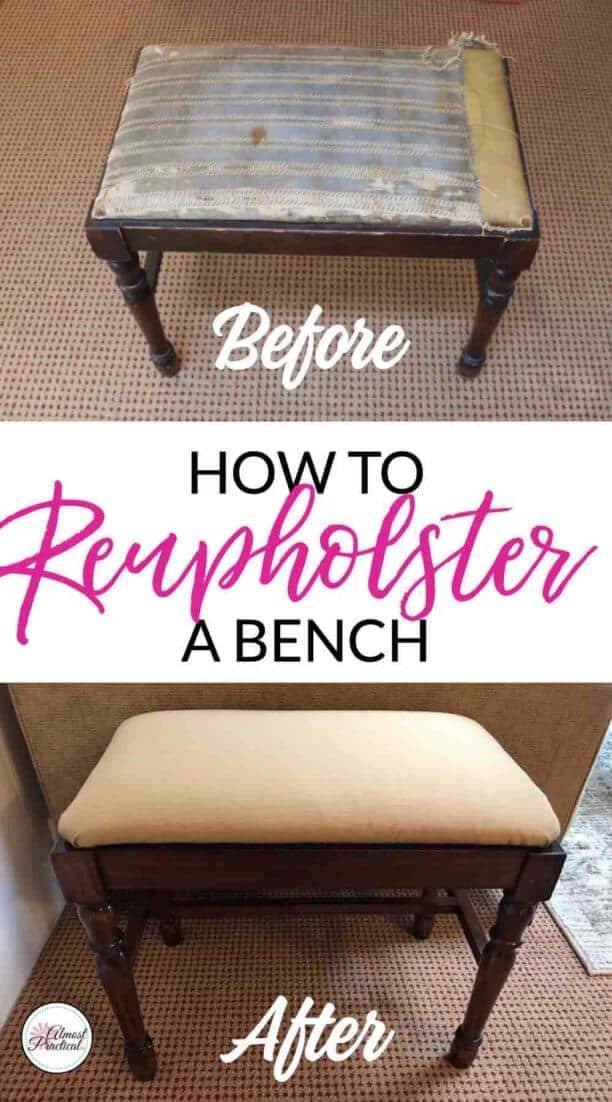
These are the steps that I took to plough my bench from this:

into this:
Gather Your Supplies
If your programme is to reupholster a demote, then you will need the following supplies.
For this project, I refinished the wooden base of operations. If you programme to pigment your base of operations, then your supplies list volition be slightly dissimilar.
For the Base
- Formby's Furnisher Refinisher
- Super Fine Steel Wool – 0000
- Refinishing Gloves
- Sandpaper
- Minwax Stain (I used Cherry-red Mahogany for this demote)
- Minwax Polyurethane in articulate gloss
- Cream brushes
- Rags
For the Cushion
- Upholstery foam – I used a 1 inch, high density, firm cream to reupholster this bench
- Upholstery batting – bonded Dacron
- Electric staple gun
- T50 Staples
- Protective goggles
- Upholstery Textile of your choice – Magnolia Habitation has some gorgeous upholstery fabrics that yous tin buy by the yard on Amazon.
Remove the Bench Cushion
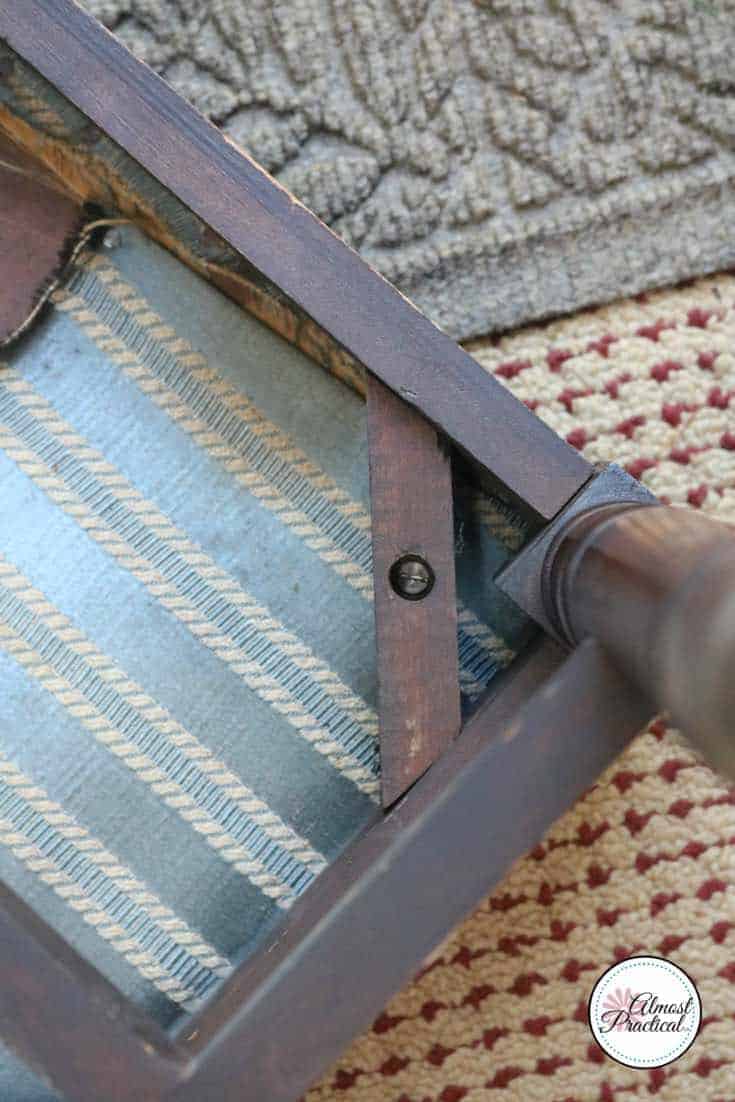
The showtime matter that I did was remove the seat cushion by turning the demote over and using a screwdriver to remove the four screws that fastened the base to the seat.
I then removed the tacks that held the old material and absorber to the base board.
Also, there were sliders attached to all four bench legs, so I removed these too.
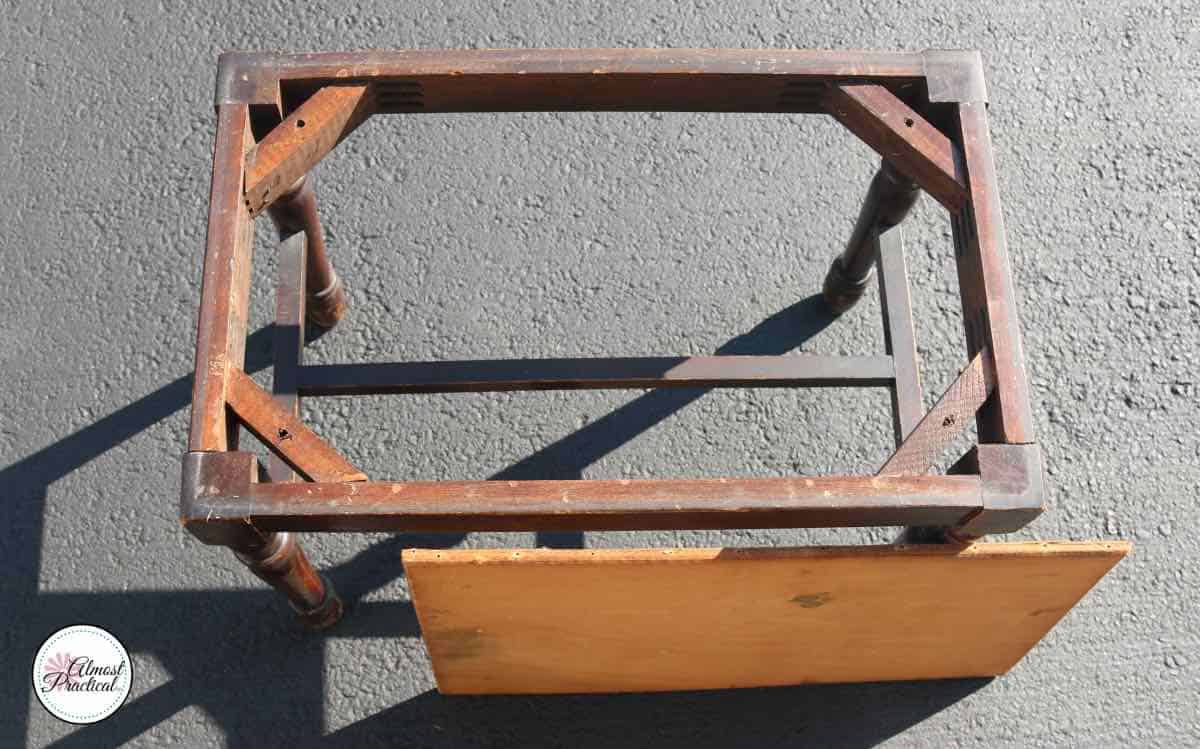
Wash the Bench Frame
Afterward I removed the cushion and the sliders, I decided to wash the wooden base because in that location was years of dust and dirt built up on it.
I simply filled a bucket with water and added a few drops of Dawn dishwashing liquid.
And so I sponged the demote off with the soapy water and followed by sponging the demote with rinse of manifestly water.
Since it was a sunny day, I let the bench frame dry out outside in the warm afternoon for a few hours.
Strip and Sand the Bench Frame
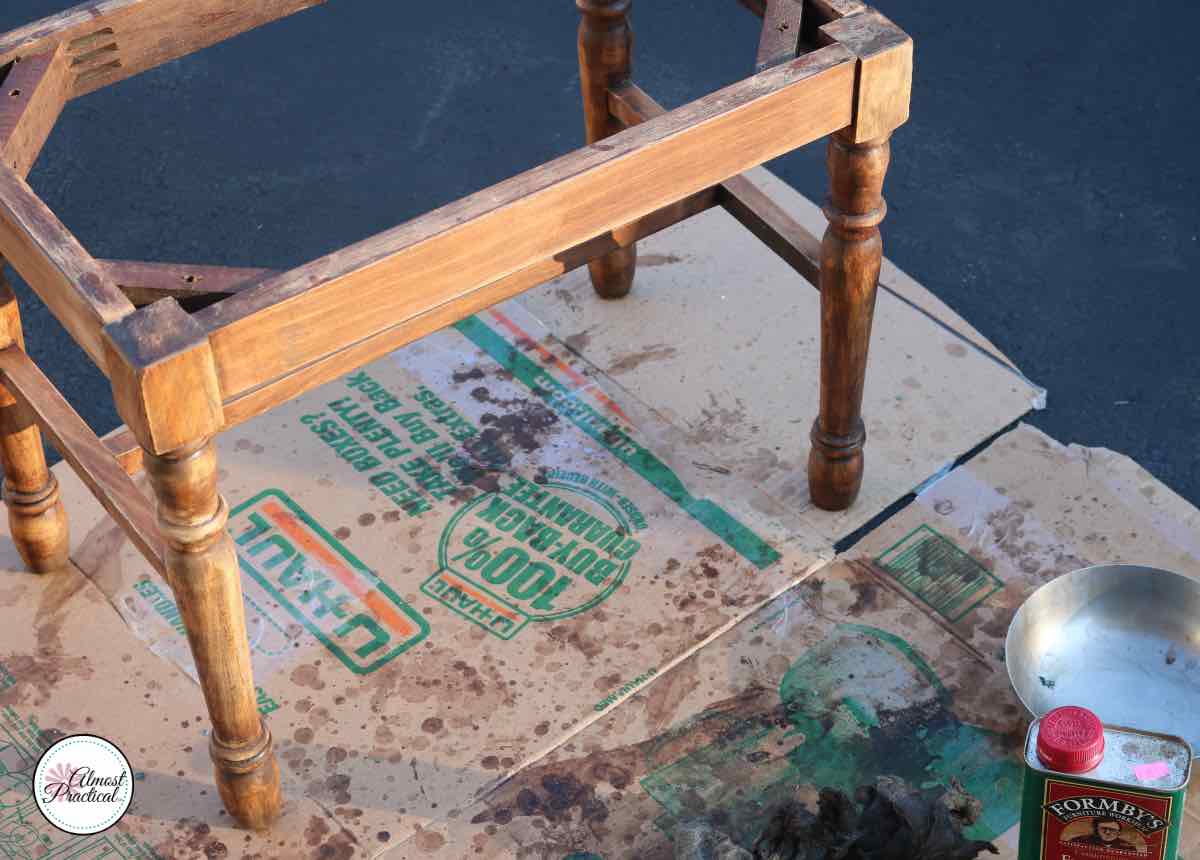
The next step to reupholster a demote is to strip the base of operations of all the former varnish. This is the part that I hate the most.
I was really hoping that a adept sanding would remove the onetime stain, because the demote was then onetime.
But no such luck.
I used the Formby'south Furniture Refinisher and the steel wool to remove the onetime varnish. Luckily I still had some left over from when I refinished my kitchen table.
In fact, many of the supplies that I need to reupholster a bench are the aforementioned ones that I used for the kitchen table project.
One thing to note is make sure to get Refinishing gloves as opposed to nitrile gloves. I used nitrile gloves and they merely dissolved in the Formby's and fabricated a large mess. I am assuming refinishing gloves volition work much better, since they are designed for this exact purpose.
After I removed all of the onetime stain, I did my best to sand down the demote frame.
I must say that I am kind of impatient when it comes to sanding. And honestly, this project of reupholstering a demote was something that I only actually wanted to be done with – and so I could have probably done a much better job of sanding.
But it is what it is.
Stain and Poly the Bench Frame
After sanding, I dusted the bench off. Y'all probably should use a tack material to go rid of any fine dust particles, just I only used a damp rag.
Next, I brushed on a thin coat of the Minwax Woods Stain.
You lot can do more than 1 glaze depending on how nighttime you want the color to exist. Just allow some drying time in between.
I used two coats to my bench. The wood was already night from the old stain, so one glaze would have been enough. Simply I felt that the coverage wasn't very even, so I applied a 2nd coat to smooth everything out.
In one case the stain was dry (I waited a whole day), I applied three coats of Minwax Polyurethane to the bench over the form of several days.
And then information technology was time to reupholster a demote cushion.
I did mention that I have never done this before, didn't I?
How to Reupholster a Bench Cushion
Since I really didn't know what I was doing, I turned to the cyberspace and followed this tutorial.
For the almost function, information technology worked well – with one upshot which I volition go to.
So, basically I cut a piece of the upholstery foam to the size of the bench seat board, adding about 3 inches actress foam on all sides (The tutorial says one inch just I was afraid to cutting the upholstery foam likewise small. I figured I could always trim it later.)
I also came beyond some other tutorial on how to reupholster a demote (I don't remember where) that used a layer of bonded Dacron upholstery batting on peak of the upholstery cream. That tutorial mentioned that using the batting ultimately gave the fabric cover a nice smooth await, so I decided to use information technology too.
For the bonded Dacron batting, I cut a piece that was a few inches bigger on all sides, than the piece of upholstery foam that I cut.
Finally, I cut a piece of upholstery cloth to be a few inches bigger all around than the bonded Dacron piece.
Attaching The Cushion Materials to the Demote Seat
Starting in the middle on i of the long sides of the wooden bench seat board, I used my handy new electric staple gun to staple the cream to the the board.
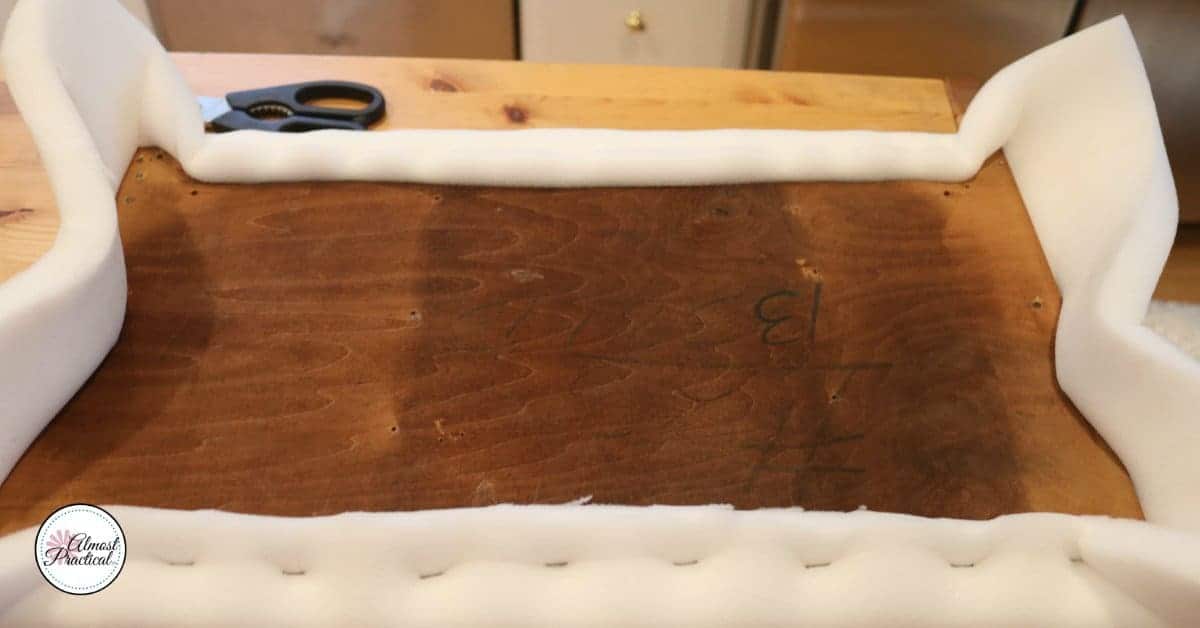
I pulled the foam tight across the board and placed i staple on the opposite long side, and and so repeated the procedure with the short sides of the demote seat lath.
Working my style from the center to the corners on each side, I placed a staple about every inch.
Yikes!
In researching this article I also plant this video which uses an entirely unlike approach.
I am tempted to redo my demote cushion now that I have seen this:
What To Do With the Corners?
This is where I felt that the tutorial brutal brusk, and I don't really have a good answer for you.
The corners.
Those blasted corners.
When you reupholster a bench seat using 1 inch loftier density upholstery foam, you lot cease upwards with a lot of foam in the corners where the ii edges meet.
The to a higher place mentioned tutorial makes it look so easy – "just staple on the diagonal, fold it over and trim the excess".
The reality is that you end up with a ton of chunky cream in the corner.
So, I fudged through and trimmed and stapled information technology down hither and there.
But ….
Today I found this video – and, boy oh boy, exercise I wish I had seen it earlier refinished my bench (I may have to go back and redo the seat cushion):
Rinse and Repeat with the Batting
Then I had to repeat the procedure with the sheet of bonded Dacron batting.
Can you imagine the thickness of cloth in the corners now?
Rinse and Repeat with the Upholstery Textile
The final step to reupholster a bench seat cushion it to comprehend it with the upholstery fabric of your selection.
I went with a plain gilt/beige colour material that I already owned. Although I wish I had picked something much prettier like these options from Magnolia Habitation.
Here is a bully video that volition help you lot choose a durable fabric for your bench:
The process of attaching the fabric is similar to that of the batting and the foam.
I purposely kept the fabric piece bigger than the foam and batting, and then I could stretch it over both those layers on the underside of the bench and staple it directly into the bench seat board.
Attaching the Bench Seat to the Frame
The terminal pace to reupholster a bench is to attach your newly covered bench seat to the frame.
The trouble with the manner I covered the bench seat is that there is a lot of material in each corner that covers the original holes.
Then, I simply sort of lined the seat upward and used the old screws to reattach the seat.
Nonetheless, at present that I accept discovered all of the amazing videos at the Textile Farms Interiors YouTube Channel – I am seriously because redoing the bench seat i terminal fourth dimension.
Have You Tried to Reupholster a Demote?
Overall, I am happy with my first attempt to reupholster a bench.
I am a complete DIY apprentice simply regardless, the bench looks much meliorate than information technology did before.
Refinishing the wood frame was a pain, but the results look dainty.
And having watched the videos that I included in this post – I now realize that I could have used a different process for the bench seat.
This would get in much less bulky in those problematic corners.
Since this particular bench does not become much utilise, I may just get out it every bit is.
But in the interest of learning how to reupholster a bench the correct way – I may go back and make a 2nd attempt at recovering the seat.
If I do, I will post an update just for y'all.
Please Pin This for Me
In the meantime, if y'all similar the new look – I would dearest information technology if you shared my DIY bench project on Pinterest!

How To Repair Leather Bench,
Source: https://almostpractical.com/reupholster-a-bench/
Posted by: hamiltoncamble.blogspot.com
0 Response to "How To Repair Leather Bench"
Post a Comment